The KME system comes in a nice briefcase style case, it's sturdy and makes storage compact. The inside is foam padded with an organizing template laid over the top. There are two kits available, mine being the KME Precision Sharpening System. The kit includes the following:
• 1- KME Knife Sharpening System Jig
• 1- Large Hardshell Case
• 1- KME Gold Series X-Coarse Hone - 140 grit
• 1- KME Gold Series Coarse Hone - 300 grit
• 1- KME Gold Series Fine Hone - 600 Grit
• 1- KME Gold Series Extra Fine Hone - 1500 grit
• 1- 1oz Water Bottle
• 1- Stop collar
• 1- 12 x 12 Cotton Cleaning Cloth
• 1- Detailed Instructions

For review purposes I've also added a few accessories: KME CBN 4-micron emulsion, 1x4x 3/16” Kangaroo Leather Strop, the "Beast" 50 grit diamond hone, 100 grit XX coarse hone, KME Pen Knife Pro Jaws, and the KME Double Clamp Bar. The KME System alone has enough to keep the average enthusiast happy. I wanted to test this system on everything from Swiss Army knives to kitchen sized knives. There are way more accessories than what I'm testing, and it makes the system very versatile.
Assembling the KME is super easy as the system has only a few part that break down for storage. All that's needed is to screw the threaded post into the base and then place the sharpening jig into the handle. Next, you'll take the guide rod and screw it into the end of the stone holder. I like to make sure my guide rod stays in the jig when I'm checking things. I'll take the stop collar that's included and put it on the end of my guide rod after it's been inserted into the angle guide. The whole ensemble is only 3 major pieces with a few smaller ones to help with assembly.

To get the best results from the system it's important to make sure your knife edge is centered in the jaws. Check the 3-winged knob behind the clamp making sure it's loose, then press the spring forward at the other end. This will release tension on the jaws and allow you to insert the spine of the knife. When you release the jaws will hold the knife in place. If your happy with is placement you can tighten that knob to lock the knife in place. I like the simplicity of the system, it's straight forward and isn't overly complicated like other systems. I think the rubber on the inside of the jaws is a smart decision by KME. It not only protects the knife from being scratched but ensures a firm grip.

I've got a blade that's pretty dull and needs a new edge, I'm going to start at the lowest grit hone to set the angle. Putting the diamond hone in the system is done by a clamp on the stone holder. Loosen the holder by using the fastener on the end, when the hone is in the holder it's not necessary to over tighten. The holder is angled towards the stone, so it does a good job making sure it doesn't move. I'm selecting the 140 X-coarse hone because it'll make short work of setting my angle. That stop collar I mentioned earlier, check the travel on your stone and set it so the stone won't come off the blade on your downward stroke.

Setting your angle on the KME can be done with the marker trick, this is an old school method, but it works. I have added an angle cube to the system as it helps me check my angle. I don't use the marker all the time especially if I'm sharpening a knife I've sharpened before on the KME. I use my angle cube to set the system back to the desired angle I had previously. This eliminates the need for me to try and find it by using the marker method. I do wish the top of the stone holder was magnetic, but this is easily remedied. I plan on glueing a metal plate on there but hadn't gotten around to doing it. Adjusting your angle is done by loosening the dial on the back of the angle finder. The numbers on the finder are more of an appropriate than an exact angle. There are many factors that change your angle such as, blade width, where it's clamped, and thickness of the hone being used.
I find the movement of the system to be very smooth. The nylon guide didn't need any lube unlike another system I have. The guide is long enough and gives plenty of travel to compensate for different sizes of knives. The diamonds move pretty smooth with a little bit of water, this is probably a characteristic of a quality diamond hone. After a matter of moments, I developed a burr and I moved to the other side of the blade to repeat my passes. With my apex established I move onto the 300-grit hone and further refine my edge. Did you know that you can shave coming off the 140-grit? Crazy!

I work my way up to the final hone which is the 1500 Extra Fine. With this hone your edge will take on a semi polished look and be extremely sharp. You can take things further by using a leather strop or KME's diamond laping films. The difference is application and the medium. You can polish on leather using a diamond paste, but I think the diamond laping films are more suitable. I have a CBN in 4-micron, it's an emulsion that has Cubic boron nitride. (CBN) is a synthetic abrasive that is one of the hardest known materials. This is applied to a piece of leather and is used to de-burr and further refine your edge. I've applied this solution to my 4-inch kangaroo leather strop. To use the strop, you only use an edge trailing or pull motion. Using this the same way as your hones will cause damage to your strop. You can have a great serviceable edge coming off the 300 or 600-grit, but the extra polish and de-burring really smooths out that edge.


I've still got the 50-grit "Beast" and 100 grit XX coarse stones to test and I've got the perfect test subject. I've got a custom friction folder I've had from Ghost Devil Knives. I got this back when he first started out, it's a prototype and very rough around the edges. It's never had a decent edge on it, the primary grind doesn't exist and as a result it's thick. I'm going to take the edge angle and bring it down to 20 degrees. I've made sure my angle was set and I checked it with my angle cube. I started with the Beast and made sure I kept water applied to the hone. Keeping things lubricated will help float the metal particles and keep the hone from getting clogged. It took me an hour to reprofile the edge and I moved to the XX coarse hone. Probably wasn't necessary but I wanted to make a full progression from lowest to highest grit. Another 30 mins later I had finished, and the edge is pretty sharp, I'm very impressed. The Beast is super aggressive and did what should have been handled by a belt. These two stones probably won't be used for everyday situations, but if you need to move a lot of material these come in handy.

I've used the KME on several knives now and I'm beyond impressed by the simplicity and quality results I get. There is a skill element to those results though. I recommend reading the KME manual as well as maybe watching some videos to get yourself aquatinted. The blades I've been sharping have mostly been in the 3–4-inch range. I'm going to test out the other two clamps and see what kind of results I can get with the KME.

The Pen Knife Pro Jaws are designed to handle knives that are too small for the standard clamps. When grabbing small blades in the standard clamps the angle may be too shallow and you run the risk of rubbing the stone on the jaws. To install the Pen Jaws, you'll need to remove the standard jaws. Loosen your 3-winged knob all the way and push forward the spring to release pressure on the jaws. The jaws should come out relatively easy and they may fall out depending on orientation. Pay attention to how the jaws came out, they're about 45 degrees to the bolt and you'll have to angle them in. To finish all you need to do is screw the knob back towards the jaws and release pressure from the spring.

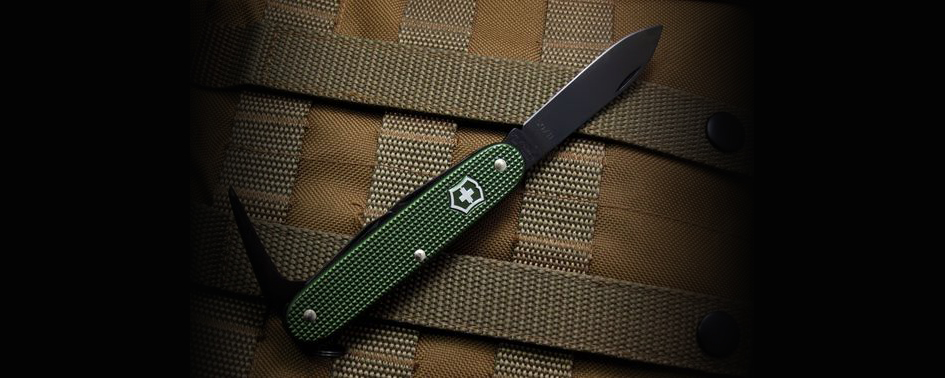
For testing I'm using a Victorinox Deluxe Tinker that's been well used and the edge isn't what it used to be. The tip is kind of rounded off and the edge bevel probably isn't even. I'm going to use the 140-grit and progress through the grit sizes. The 4-inch hones are exceptional for smaller blades as I'm able to make a sweep in a single pass. The steel moves easy under the hones and made fixing this blade easy. After the 1500 I decided to use the 4-micron strop. The Tinker took a super keen edge and arm hair just about jumps out of the way.


Having tackled a smaller knife there's only one thing left to do and that's tackle a kitchen knife. For this I'm swapping out the Pen Jaws for the Double Clamp Bar. Installing the bar is different than the previous jaw change. It's got a few steps, but it involves putting the standard jaw on the side of the DCB that doesn't have one (one comes pre-installed) and tighten it down. Then you need to put the bar where the jaw normally goes but with the T bolt perpendicular to the opening in the bar. Tighten the 3-wing knob to secure the bar and you're ready to roll.

The DCB has two jaws that can be moved towards or away from the central pivot. This allows you to fit knives of different lengths, especially those that may be too flexible to sharpen with a single jaw. The kitchen knife I chose has been seriously abused and I'm not sure when it was sharpened last. For some context, my in-laws use knives for everything including prying. They often don't last long, and they need some attention.

I like the knobs for the jaws on the DCB, they're easy to tighten or adjust. With the knife clamped in the jaw I feel it does a good job at keeping the blade from flexing. With a knife this long, there's bound to be some deviation in angle from heel to tip but its less than a degree in either direction. Finding a good spot for the jaws was somewhat tricky being my first time. Too close together and the adjustment knob hits the jig, too far out and the stone hits the jaws while trying to reach the tip. Once I found a spot that was both stable and allowed rotation, I was good. The knife has some pretty simple steel, probably not of high hardness either. Not knowing what angle was originally on the knife I decided to put a 17-degree angle on it. The stones made easy work of this dollar store knife and reprofiling didn't take long. With the steel being soft I was able to get it extremely sharp but unable to shave hair with it. The clamps prevented any kind of flexing and it felt stable during sharpening.
The new Double Clamp Bar is a neat addition to KME's extensive collection of accessories. It's well designed and feels like it's always been a part of the system. The guys at KME do such a great job listening to their user base. As a result, they're always finding ways to improve the system through accessories. The main jig is an awesome sharpener and will deliver scarry sharp edges. However, it's through the addition of strops, jaws and films that truly take the system to the next level. Just in jaws alone you've got the standard, pen, broadhead and double clamp.
The KME system is versatile and does not disappoint when it comes to performance. It's well-designed, easy to assemble, and user-friendly. I'm a huge supporter of domestic products and the KME is made right here in Branchville, NJ. Support is awesome as well, if you need help with your system Brian is your guy. He over sees the tech portion of sales for the company and he's their rain or shine. If you're looking to take the edges on your knives to the next level, maybe you should add a KME to your kit.


